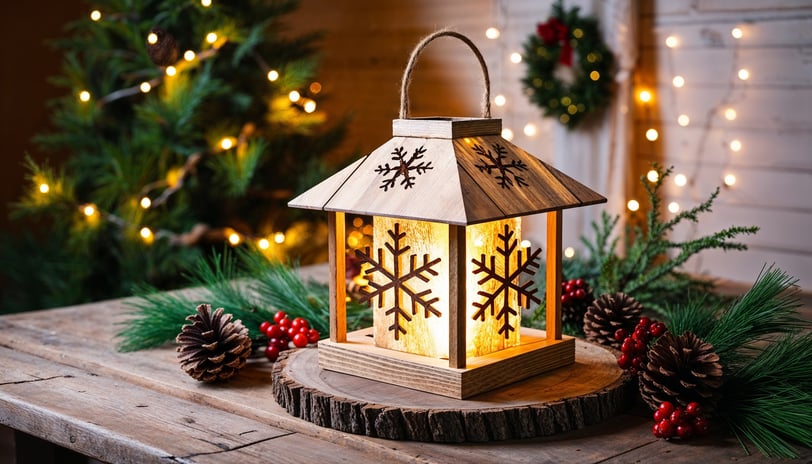
Light Up Your Holidays with DIY Wooden Christmas Lanterns
Looking to add a handmade, rustic touch to your holiday decor? There's nothing quite like the charm of wooden Christmas lanterns to bring a warm, festive glow to your home. Ideal for decorating entryways, dining tables, or even your mantel, these lanterns combine style, functionality, and the wholesome joy of crafting them yourself.
This easy woodworking project is perfect for DIY enthusiasts and woodworkers who love merging their skills with creativity. Follow along as we guide you through crafting stunning, customizable wooden lanterns that will light up your home this holiday season.
The Allure of DIY Wooden Christmas Lanterns
Few decorations feel as inviting as the soft light of a lantern during the holidays. Combine that with the rich, natural textures of wood, and you’ve got a decor piece that screams cozy Christmas vibes. Wooden Christmas lanterns make for an easy yet elegant project that allows you to showcase your woodworking skills while creating a festive masterpiece.
From beginners to experienced woodworkers, this project is accessible to anyone with basic tools and the desire to create. Plus, these lanterns make for amazing homemade gifts or centerpiece-worthy decor for holiday gatherings.
Step-by-Step Guide to Crafting a Wooden Christmas Lantern
Materials and Tools You’ll Need
Before we get started, here’s a list of essentials to gather for your DIY wood lanterns project:
Wood (pine, oak, or poplar are great options)
Measuring tape
Saw (hand saw or table saw)
Sandpaper (medium to fine grit)
Wood glue
Nails or screws
Drill
Paint or wood stain (optional)
Glass panels or frosted acrylic sheets (optional, for an enclosed look)
LED candles or fairy lights


Step 1: Design and Plan
Decide on the size and style of your lantern. Will it be a tall, rectangular piece or a compact square design? Sketch your design on paper, including dimensions, before heading to your tools.
Pro Tip from Ana White (DIY and woodworking expert): "Always measure twice and cut once. Planning is half the success of any woodworking project."
Step 2: Cut the Wood
Using your saw, cut your wood pieces according to your design. Typically, you'll need four vertical slats for the frame and additional horizontal cuts for the top, bottom, and any decorative crossbars.
Step 3: Sand and Smooth
Before assembly, ensure every piece of wood is free of splinters and smooth to the touch. Sand the edges and surfaces using medium-grit sandpaper, and finish it off with fine grit for a polished look.
Step 4: Assemble the Lantern Frame
Start by gluing the pieces together to form the basic lantern shape. Once the glue is dry, reinforce the frame with nails or screws for added stability.
Step 5 (Optional): Add Glass or Acrylic Panels
If you’re opting for an enclosed lantern, measure and cut glass or acrylic panels to fit the sides of your lantern. Use wood glue to securely attach the panels inside the frame.
Step 6: Finishing Touches
Apply a wood stain or paint to match your holiday aesthetic. For a distressed, rustic look, use sandpaper to lightly remove some of the paint after it dries.
Step 7: Add Lighting
Place an LED candle or string of fairy lights inside your lantern. Avoid using real candles, as wood is highly flammable.
Creative Ways to Customize Your Lanterns
1. Paint & Stain
Experiment with festive colors like deep reds or forest greens, or go for a classic natural wood stain for that rustic holiday feel.
2. Carvings and Patterns
Use a Dremel tool to carve snowflakes, stars, or Christmas trees into the wooden panels for added character.
3. Personalization
Engrave names, initials, or holiday greetings to make each lantern uniquely yours or extra special as a gift.
4. Decorative Add-Ons
Dress your lanterns with artificial holly berries, pinecones, or ribbon to add an extra festive flair.
April Wilkerson, DIY advocate, mentions, "Custom touches make your project feel like a true labor of love. Don’t shy away from bold ideas!"
Tips for Choosing the Right Wood and Tools
Wood Selection
Softwoods like pine are budget-friendly and easy to work with, especially for beginners. Hardwood options like oak can provide a sturdier, more refined finish for experienced woodworkers.
Tools
Invest in quality saws and drills to ensure precise cuts and clean finishes. "The right tools make all the difference," says Bob Clagett, creator of "I Like to Make Stuff."
Safety First When Working with Wood
While this project is beginner-friendly, woodworking always comes with risks. Keep the following in mind:
Wear safety goggles to protect your eyes from sawdust.
Use gloves for handling rough wood and power tools.
Ensure your workspace is well-ventilated, especially when working with stains or paint.
Never rush—take your time to cut and assemble safely.


Where and How to Display Your Lanterns
Now that your lanterns are ready, you can use them to elevate your holiday decor. Here are a few ideas:
Front Porch: Line your entryway with glowing lanterns to welcome holiday guests.
Dining Table: Use as a centerpiece for cozy Christmas dinners.
Mantelpiece: Pair with garlands and fairy lights for a warm, festive glow.
Hearth Display: Place next to your fireplace to complement the cozy ambiance.
Share Your Lantern Creations!
You’ve put in the effort to craft your beautiful wooden Christmas lanterns—why not share them? Post your creations on Instagram or Pinterest and tag us @WoodPeaker. We’d love to feature your work and inspire others to pick up this fun and rewarding project.